3 — Download SQL Server 2025
To install SQL Server 2025, you first need to download the setup file from the official Microsoft website. Always use the official source to avoid problems or fake versions.
 Editions of SQL Server 2025
Microsoft gives different editions. Choose one based on your needs:
| Edition | Best For |
|---|---|
| Developer | Learning, testing, development |
| Express | Small apps, light workloads |
| Standard | Medium business, production |
| Enterprise | Large business, advanced features |
 For practice, Developer edition is best. It has all features of Enterprise, but it is only for non-production use.
How to Download
-
-
- Go to the Microsoft SQL Server 2025 download page.
Click the link below to open the official Microsoft page for downloading SQL Server 2025 Preview (public preview version):
Download SQL Server 2025 Preview (Microsoft Evaluation Center)
- Click Download.
- Save the
.isoinstaller file to your computer.
Keep the file in a known folder (likeDownloads) because you will use it in the next step for installation.
- Go to the Microsoft SQL Server 2025 download page.
-
4 — Install SQL Server 2025
After downloading the setup file, you can start the installation. The steps are simple, but there are a few options you should choose carefully.
Step-by-Step Installation
- Mount the ISO file
- Open the drive and run setup.exe.
- Choose “New SQL Server stand-alone installation”
-
This option will install a fresh copy of SQL Server.

-
- Accept license terms
- Read and accept Microsoft’s license agreement.
- Adjust the next few pages to your needs and continue.
- Azure Extention for SQl Server
-
During installation, SQL Server 2025 gives you the option to add the Azure Extension for SQL Server. This feature connects your local SQL Server to Microsoft Azure services. With it, you can enable automatic backups to the cloud, use Azure security and monitoring tools, and manage your database in a hybrid environment. If you are only using SQL Server on your personal computer or for testing, you can skip this option. For business or cloud integration, enabling it can give extra value.

-
- Feature selection
- Select the features you need.
- For most users:
 Database Engine Services
- SQL Server Replication (optional)
- Full-Text and Semantic Extraction (optional)

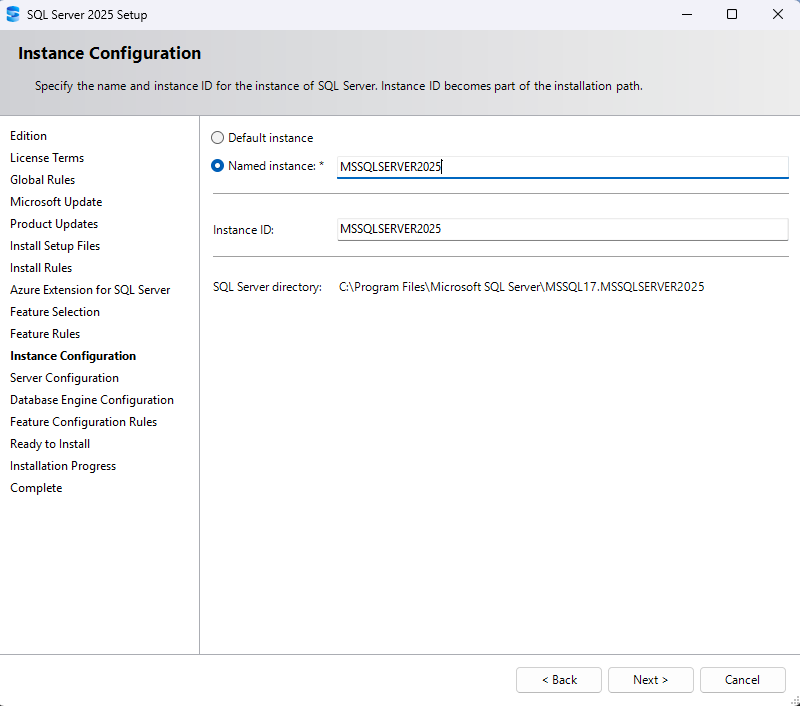
- Instance configuration
- You can keep Default instance if this is your first SQL Server.
- If you plan to install more than one, choose Named instance.
- Server configuration
- Keep the default service accounts unless you have special needs. These accounts are already optimized for normal use and security.
- You will also see a check box: Grant Perform Volume Maintenance Tasks to SQL Server Database Engine Service.
- If you check this, SQL Server can create and grow database files faster (instant file initialization).
- It is safe to enable this in most cases, and it can improve performance, especially when working with large databases.
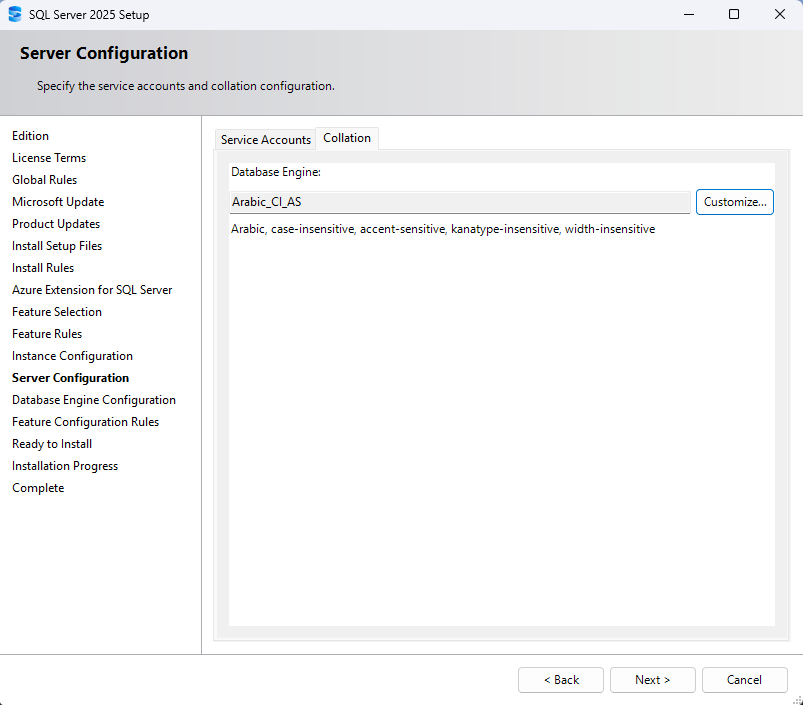
- On the Collation tab, you can set how SQL Server handles text sorting and comparison.
- The default collation (usually
SQL_Latin1_General_CP1_CI_AS) is fine for English systems. - If you work with other languages (for example Persian, Arabic, or Asian languages), you may want to choose a collation that matches your language and case sensitivity needs.

- The default collation (usually
- Database Engine configuration
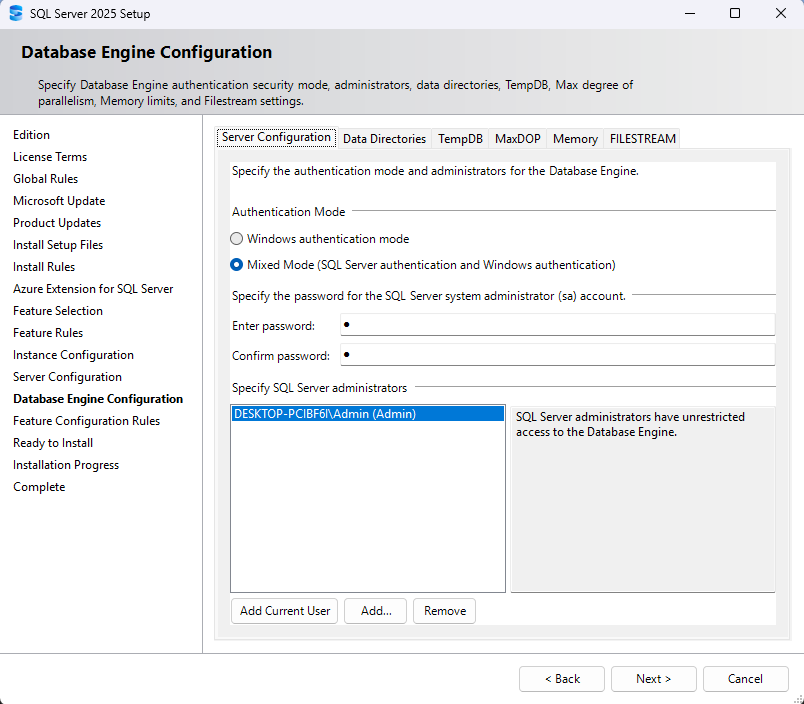
Server Configuration
- Choose Mixed Mode (SQL Server authentication and Windows authentication).
- Create a strong password for the sa account.
- Add your Windows user account as an SQL admin (so you don’t lose access later).
Data Directories- Here you can change the location of system databases, user databases, and backup files.
- By default, they go to the C: drive.
- For better performance, you can move Data files and Log files to different drives.
- Example: Data on SSD, Logs on another disk, Backups on a separate storage.

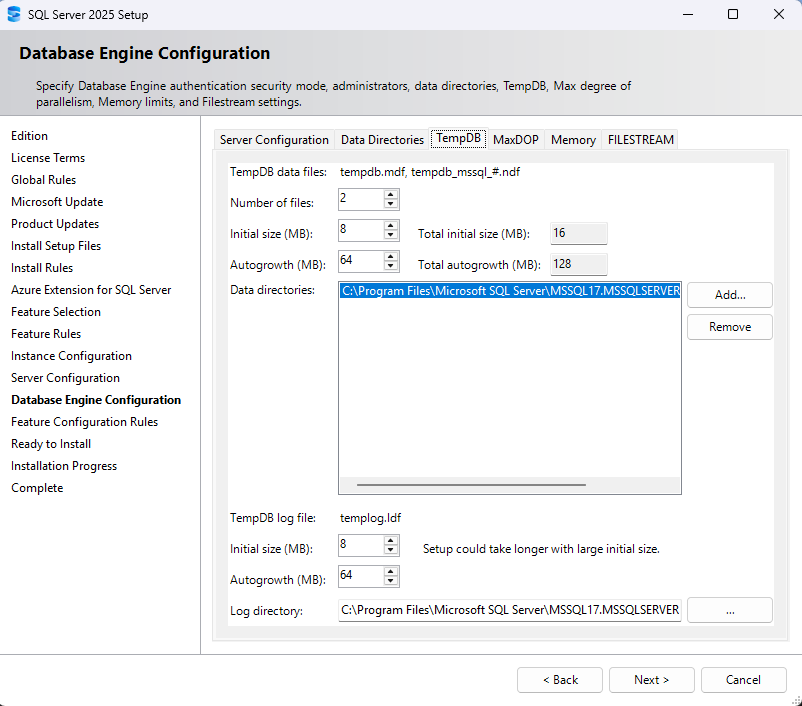
TempDB- TempDB is a system database used for temporary operations.
- Best practices:
- Create multiple data files (usually 1 file per CPU core, up to 8).
- Put TempDB on a fast SSD.
- Make sure the size is big enough to avoid frequent auto-growth.
MaxDOP (Maximum Degree of Parallelism)- This controls how many CPU cores can run a single query.
- Default may not always be optimal.
- Best practice: set it to the number of cores in one NUMA node (often 8).
- For OLTP systems, use lower values (like 4 or 8).

Memory- You can limit how much memory SQL Server will use.
- Default lets SQL Server use almost all system memory, which may hurt other apps.
- Best practice:
- Leave at least 2–4 GB for the OS.
- Example: If the server has 16 GB RAM, set Max Server Memory to 12–14 GB.

Filestream- If you plan to store large files (images, documents, videos) inside the database, you can enable Filestream.
- For most cases, you can leave it disabled.
- Only enable if your application needs this feature.

- Installation
- Review the summary.
- Click Install.
- Wait until setup completes, then click Close.

5 — Download and Install SQL Server Management Studio (SSMS)
SQL Server Management Studio (SSMS) is the main tool for working with SQL Server. It gives you a friendly interface to create databases, write queries, back up data, and manage security. Microsoft provides SSMS as a separate download, and it is always free.
How to Download SSMS
-
- Go to the official Microsoft SSMS download page(Link bellow).
- Click on the Download SSMS.
- Save the installer file.
 Download SSMS (Microsoft official page)

How to Install SSMS
-
- Run the installer file you downloaded.
- First, the installer will download the main setup files from Microsoft.
- After the download completes, the main installation window will appear.
- In this window, you will see four tabs:
- Workload
- Here you can choose groups of features for different tasks.
- For most users, keeping the default workload is enough.

- Individual components
- This tab lets you select specific tools and features.
- Use this if you want only certain parts of SSMS, but usually the default

- Language packs
- You can install SSMS in other languages.
- If you work in English, you can skip this.

- Installation location
- Lets you choose where SSMS will be installed on your computer.
- If you don’t have a special reason, keep the default path.

- Workload
- After reviewing these tabs, click Install.

- Wait a few minutes until the setup finishes, then click Close.
- Run the installer file you downloaded.
6 — Connect to SQL Server with SSMS
Now that both SQL Server 2025 and SSMS are installed, it’s time to test the connection and make sure everything works.
Open SSMS
-
-
- Launch SQL Server Management Studio from the Start menu.
- The Connect to Server window will appear automatically.
-
Connection settings
-
-
- Server type: Database Engine
- Server name:
- If you installed a Default instance, you can simply type
localhost. - If you installed a Named instance, type
localhost\YourInstanceName.
- If you installed a Default instance, you can simply type
- Authentication:
- Choose Windows Authentication if you log in with your Windows account.
- Choose SQL Server Authentication if you want to use the
saaccount.
-
Test your setup
-
-
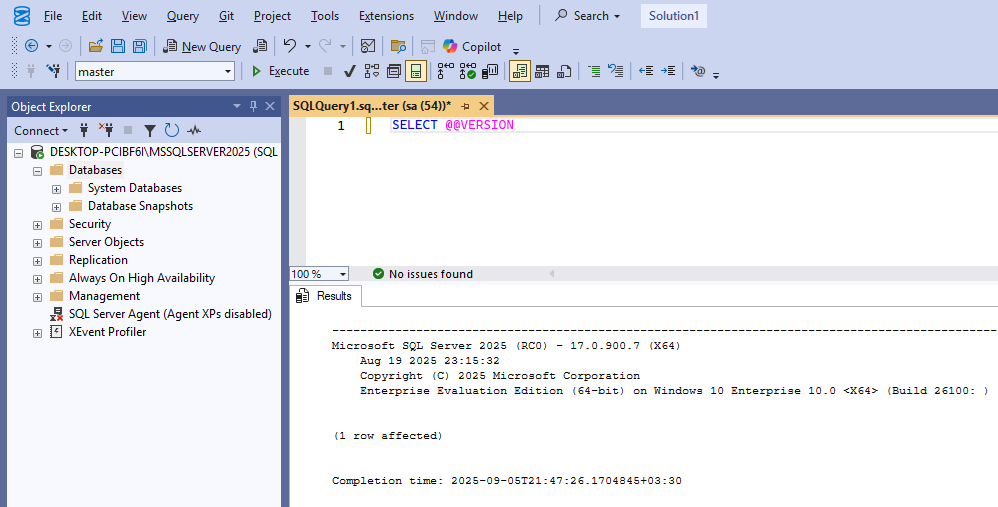
- After logging in, open a new query window.
- Run the following command:
-
SELECT @@VERSION;
-
-
- This will show the version of SQL Server you installed (for example: Microsoft SQL Server 2025 Developer Edition).
- This will show the version of SQL Server you installed (for example: Microsoft SQL Server 2025 Developer Edition).
-
Tip If you cannot connect:
-
-
- Make sure SQL Server services are running (check in SQL Server Configuration Manager).
- Check that you are using the correct instance name.
- If needed, enable TCP/IP in SQL Server Network Configuration.
-